Results 31 to 45 of 226
Thread: Photography How-to
-
13 March 2010, 14:50 #31
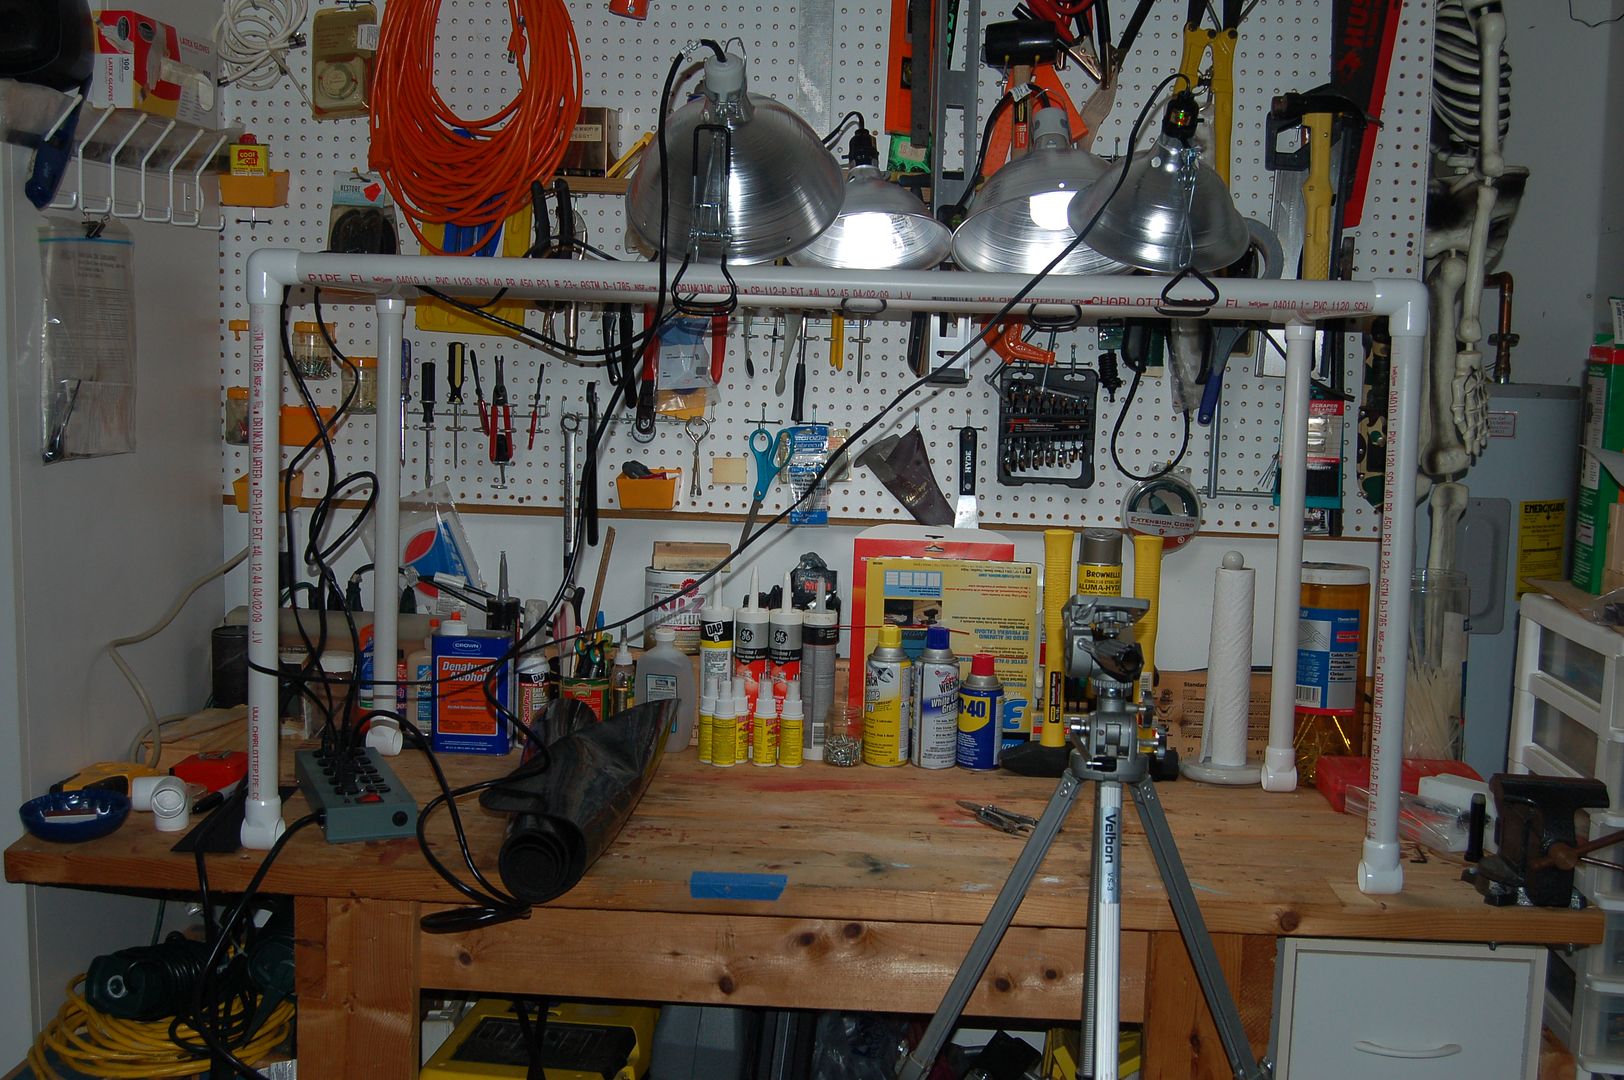
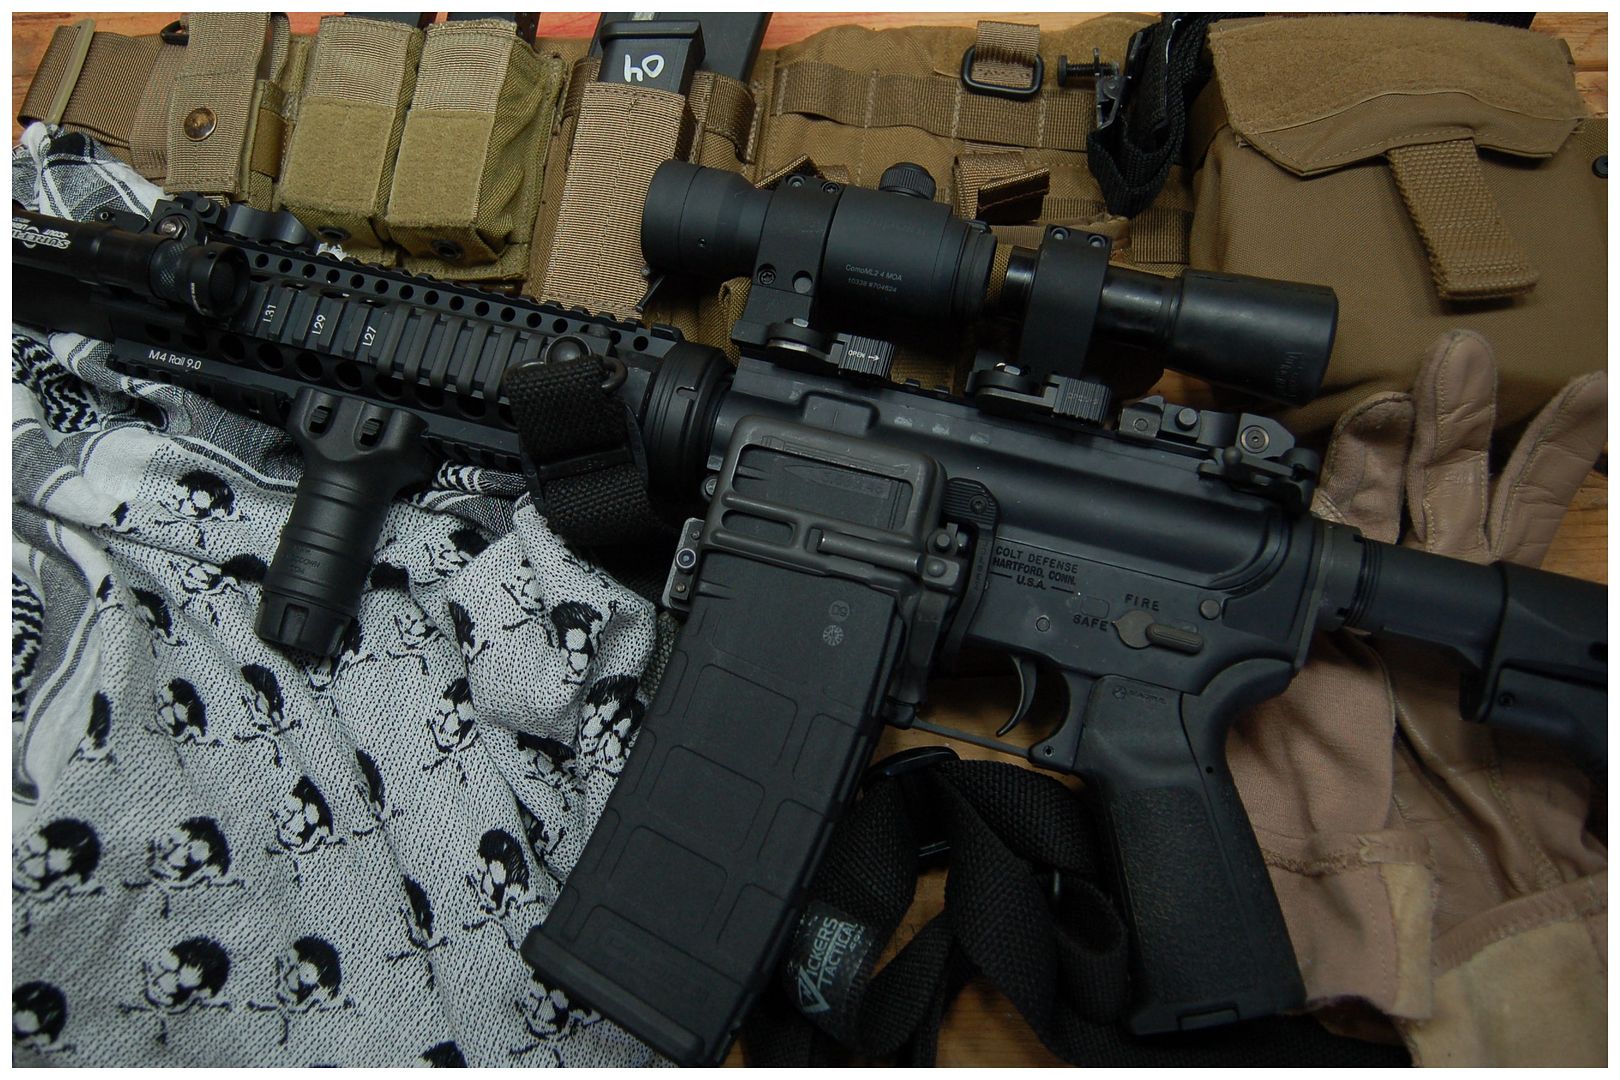
I finally got around to using the lights. Quite the learning curve!
I used this

to make this

critiques? I would have liked to have filled in the background a bit more but was running out of junk to throw in there.WWW.TACTICALYELLOWVISOR.NET
-
13 March 2010, 15:33 #32
Each person who views the image will have their own take on what should or shouldn't be included.
When I talk with graphics people/ clients of mine, they have commented that there is an art form with layout that people either have, or don't, with little in between. At times I think I'm close, and there are other times I think I'm way off base.
The above shot looks like what I would expect to see from a writer in a magazine as opposed to what I would see from the photographer. I'm not sure if that is going to make sense to many people, but I think Rob might know what I mean.
-
13 March 2010, 15:38 #33
 Distinguished Member
- Join Date
- Aug 2007
- Posts
- 1,584
- Downloads
- 11
- Uploads
- 4
-
13 March 2010, 15:42 #34
 Distinguished Member
- Join Date
- Aug 2007
- Posts
- 1,584
- Downloads
- 11
- Uploads
- 4
Iíve had good luck in my lamps, using the energy savings bulbs that emulate daylight. When I need to defuse the light a bit, Iíll clip a piece of typing paper across the light reflector.
-
13 March 2010, 16:39 #35
Yeah, I'm going to spring for two more big ones. The little ones work well for fill, but the clamps suck and they don't stay put like the big ones do. I'm thinking of coating the whole rack in bedliner material so that it's not so smooth and the clamps have something to bite on.
WWW.TACTICALYELLOWVISOR.NET
-
13 March 2010, 16:56 #36
 Distinguished Member
- Join Date
- Aug 2007
- Posts
- 1,584
- Downloads
- 11
- Uploads
- 4
-
16 March 2010, 12:55 #37
 Member
- Join Date
- Nov 2009
- Posts
- 2
- Downloads
- 0
- Uploads
- 0
-
16 March 2010, 14:50 #38
Indirect sunlight is my favorite source of lighting. Not always consistent though but looks the most natural.
Some of my pics with post-editing in photoshop...


-
17 March 2010, 12:17 #39
I agree with you. The placement of each object is a bit too linear. The rifle is acting as a fence for the different objects behind it. Every piece seems to have a cordoned off zone and it draws the eyes evenly to each area. This creates very little tension which is not what you want. Also, try using extreme angles to create a more dramatic scene. It's a little heavy in the center which makes it feel too planted. The focus is pretty sharp which is good. I'd like to see a bit more light as the exposure seems a bit dark.
If you have Aperture, Lightroom or Photoshop you can play around with pic more so you don't have to frame everything in the camera.
-
17 March 2010, 13:26 #40
I missed stick's post before, thanks for quoting him!
Both of you are correct, and as stick noted I'm a writer not a picture-maker. There is a caption that goes with the pic that has to do with the carbine, and my concern was that I wanted to fill up the background with .... something but also make the rifle the focus. I was concerned that the belt actually was too distracting.
The critique re: the lighting is a good point, and it looks darker on my screen at work than it did on the screen at home where I did the cropping and fiddling. Anyone have a solution for that? I'm constantly fighting with it.WWW.TACTICALYELLOWVISOR.NET
-
17 March 2010, 15:03 #41
Since it's about the rifle, then you don't really need the extras in the backdrop. You can use a drop cloth or even white paper so it doesn't distract too much from the main object you're wanting to shoot. Smooth concrete or a sheet of wood would also be interesting without detracting too much.
You really have to play around with the objects in the background if you're wanting to keep them. Sometimes it's best to try letting the other items fall naturally. When you straightening them out they make the pic look flat. It's difficult to make it look natural but that comes with experience and trial and error.
You could calibrate your brightness and contrast for your monitor but not everyone will have their monitors balanced correctly. Many run them a bit dark as it's easier on the eyes. Not too many people really know how to use a test pattern anymore.
In general, I think going a bit too light is probably better then too dark. I bumped your picture's brightness and contrast up a little so it's a bit brighter. The lights and dark's start to separate more and things start to pop out with just a few little changes.


-
17 March 2010, 18:40 #42
 New Member
- Join Date
- Mar 2010
- Location
- VA
- Posts
- 15
- Downloads
- 0
- Uploads
- 0
Some excellent information in this thread. It looks like I'll have another project and some work to do to try and catch up!
Jerry - Are you using the white fabric to difuse any of the light? For instance, having fabric on the side of the light box and using the lights to the outside of the fabric. If so, did you find one fabric better at diffusion than others? TIA.Last edited by Defender3; 17 March 2010 at 18:45.
-
17 March 2010, 19:58 #43
I love shooting with natural light but it's one of the most difficult ways to shoot since you can't control it 100%. The first pic is nice but there is way too much glare. It looks like the sun is at the top of the picture so the glare is amplified. Always shoot with the sun to your back if at all possible. It will light up your subject instead of lighting up what's behind it.
The second pic has a bit too much exposure so everything looks washed out. A lot of the detail of the slide is lost. The background is a bit distracting with it's pattern which draws the eye away from the real subject matter. I'd also consider not shooting it straight on as it makes it look flat. Also, shoot from a tripod and then try not to use an ISO over 400 (you're at 1600. Lower is always better as higher ISO's introduce noise). I tend to shoot in manual mode as A-Mode tends to be a little too much exposure. I'll say more about that at the end.
Next is the Savage. The shadows are a bit too distracting and again it's a little over exposed. It isn't really sharp either. It's in A-Mode which explains the exposure. I think it would have been more interesting to stand it up and then use a ladder to shoot from a higher angle. Probably better to wait till a later part of the day as well.
Then the Kimber. Similar to the AR, there is a light source from a window or light from above. Much of the detail of the slide is lost in all that white. I would try to defuse the light more. Maybe sure a sheet or wait till later in the day. With natural lighting the best times are just after run rise and right before sunset. You usually only have 2 hours or so to work with. I like evenings an the sunlight gets a bit more defused and everything starts looking more vibrant. The angle is more interesting. I'd maybe try shooting from even lower. The one area that bugs me is the black of the base plate and how close it is to the bottom of the crop. There is a lack of detail there as well.
Here's a suggesting for everyone. Look at your light meters. This will tell you how might light you're getting and if your pic will be over or underexposed and by how much. Also, look at your histograms. Now this isn't always possible with a DSLR since most don't have a live viewfinder. But take a picture and look at it. It should have a nice bell shape to it. If the lines are all bunched up to one side then that's not good.
Also, try shooting at a slower shutter speed. This will help you get more detail but beware, if you go too slow, you will start to introduce blur. This is a good time to start using a tripod. Some cameras have image stabilization but that only helps so much. Also, it is good not to use it when you don't actually need it. You will find that the pictures will be a bit more sharper then with IS on.
Back to A-Mode. A-Mode is OK but I don't like how most tend to shoot with a bit more exposure then I like. I usually shoot a little on the underexposed side so the colors are a bit richer. If you have a DSLR then try setting up bracketing mode. This allows you to take 3 pictures at one time. Generally they will be 1/4 stop overexposed, normal exposure and 1/4 stop under exposed. This is usually seen as +1 0 -1. You should be able to set it to a number of combination. This will help hedge your bets as many times the one you really wanted wasn't at the setting you had it set for.
Don't be afraid of M-Mode. If you watch your light meter you'll get a hang of setting your Aperture manually. For those with P&S, you don't have much choice so it's either S-Mode or A-Mode. Also, shoot in RAW format instead of jpg if you can. RAW's are uncompressed files so there is no reduction in quality.
Oh and if you have an internal flash, try not to use it. If you have to try taking a piece of paper and reflect it upwards. Internal flashes aren't very good and cause artificial highlights that cause loss of detail. If you can get an external flash and bounce it off the ceiling. You'll get a more even light source.
Well, enough of me rambling. I hope this helps.
-
18 March 2010, 01:19 #44
-
18 March 2010, 01:24 #45
Different diffusers impart a different spectral quality, and a large part of it becomes a matter of what you are looking for in your images.
A lot of people will simply say to go with the thinnest thing you can find, I'm not one of them, but I won't argue their opinions. If those are the results they like, who am I to comment.


 Reply With Quote


