

Results 1 to 8 of 8
Thread: TLR-1 Switch modification
-
4 January 2011, 13:57 #1
 Contributing Member
- Join Date
- Mar 2009
- Location
- NW FL
- Posts
- 332
- Downloads
- 0
- Uploads
- 0
TLR-1 Switch modification
After seeing Quib's photo of modding his tail switch on the TLR-1, I shot him a couple of questions this morning, and got started on my own project.
Here's the inspiring picture:

Tools:
1/16 allen wrench
long file
needle file
emery boards
(in my case:)
Dremel with cutoff wheel
Soldering iron
Initially, I thought I could get away with using a jigsaw blade and take my time, but the plastic is pretty hard, and I switched to the dremel pretty quick.

Remove your tailcap and use the allen wrench to remove the small bolt holding the switch. You will have to gently pull up, as the switch has two locating tabs under it.
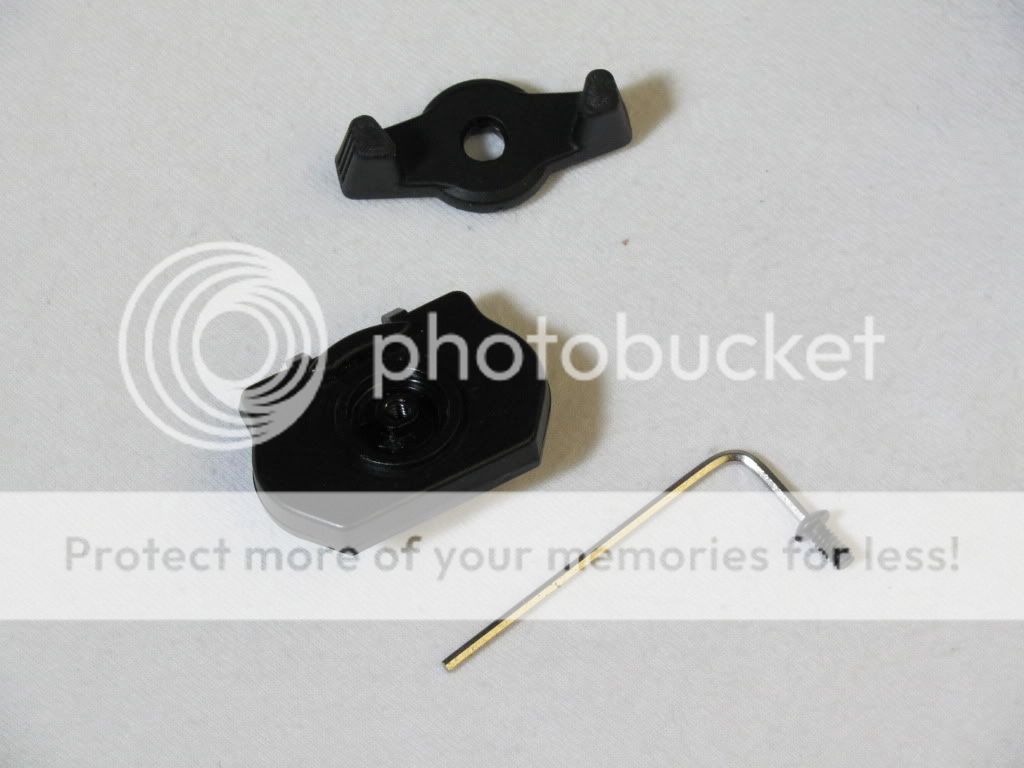
Instead of going flat with mine, I still wanted to retain "nubs" as my setup requires a pull for constant on, and a push for momentary. Use a pencil to mark off the length you're after.
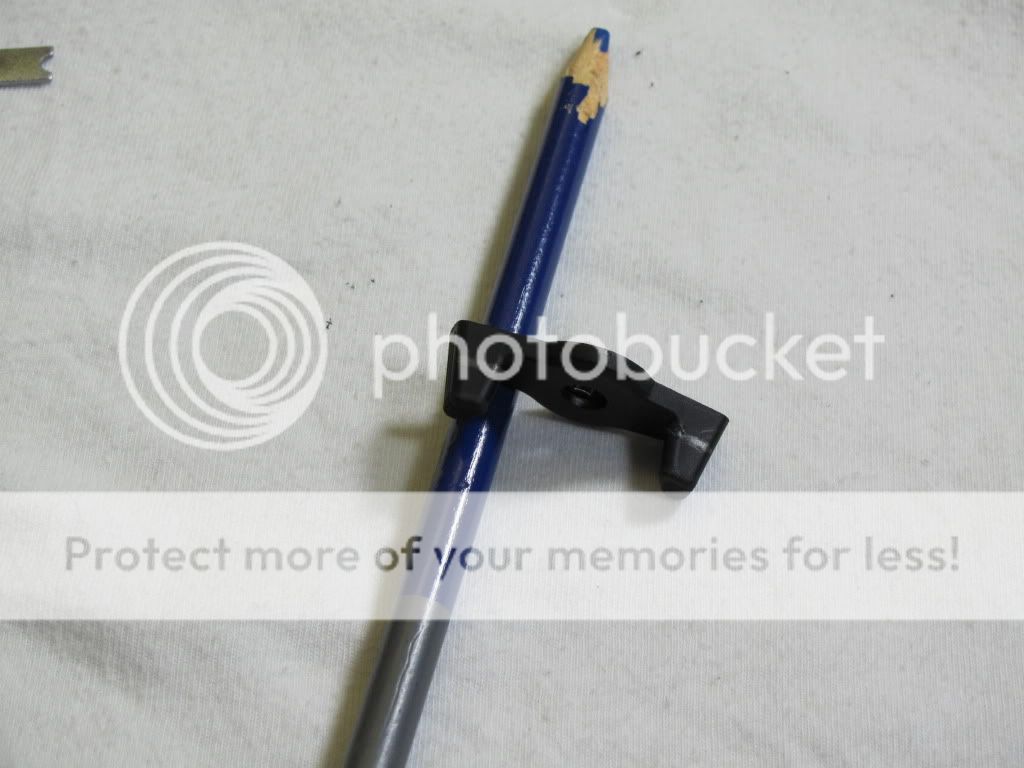
Again, I tried to handcut these to be a bit more presice without the melted mess yet just because it did fine on SCAR panels, the switch lever will not cooperate. Dremel the tabs off along your mark. Something of note, the tabs appear to be hollow, I'm OK with that
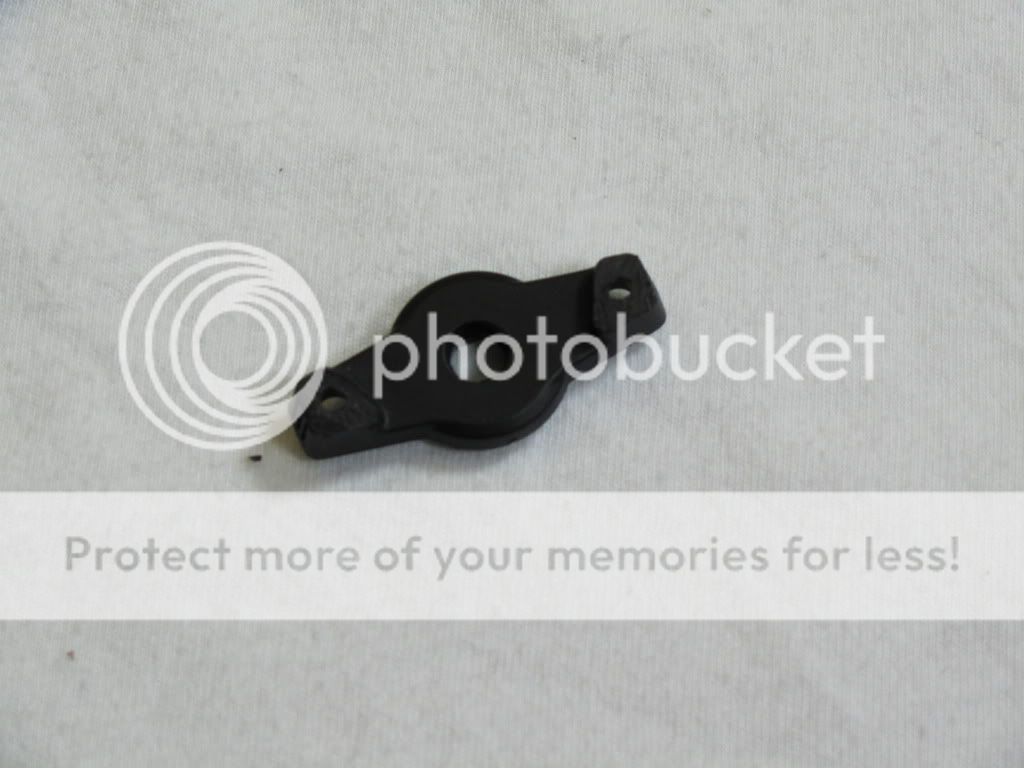
This will be the longest part of the job, cleaning the modified area. Use your fine long file to drag and round the cut edges, the needle file for the spots your file will not get, then the emery boards for finish. I ended up with the basic shape I was after in a few minutes per side.

Grab your soldering iron, or, if you cut them flat, this would be where you could apply grip tape as in Quib's picture at the start of this post. I used a battery operated one since this was a quick simple job. Not as clean as some, but gets the job done.

Then, once satisfied, reinstall your switch with the bolt and test.


Lights have been on the brain for a few days, and no more accidental momentary "ons" when grabbing the weapon. Just as easy to get on with or without gloves, yet I have to make it go to momentary. Works for me.
-
4 January 2011, 14:19 #2
Distinguished Member
- Join Date
- Aug 2007
- Posts
- 1,584
- Downloads
- 11
- Uploads
- 4
Good job GS!
Thanks for taking the time to write up a tutorial!
-
4 January 2011, 14:33 #3
Contributing Member
- Join Date
- Mar 2009
- Location
- NW FL
- Posts
- 332
- Downloads
- 0
- Uploads
- 0
No problem, thanks for the idea!
-
4 January 2011, 17:06 #4
Distinguished Member
- Join Date
- Aug 2007
- Posts
- 1,584
- Downloads
- 11
- Uploads
- 4
 Originally Posted by GriffonSec

Always happy to exchange ideas.
-
4 January 2011, 17:17 #5
Moderator
- Join Date
- Apr 2009
- Location
- Central Florida - Gulf Side
- Posts
- 2,221
- Downloads
- 2
- Uploads
- 2
Very Nice write-up - thanks.
NRA Benefactor Member
NRA Certified Instructor
"I won't be wronged, I won't be insulted, and I won't be laid a hand on."
John Wayne - "The Shootist"
-
5 January 2011, 05:06 #6
Contributing Member
- Join Date
- Feb 2008
- Posts
- 129
- Downloads
- 0
- Uploads
- 0
Thanks, for sharing. Very nice job.
What can one man do? You never know until you try.
-
16 March 2011, 09:27 #7
Member
- Join Date
- Jan 2011
- Location
- Barre, VT
- Posts
- 33
- Downloads
- 0
- Uploads
- 0
Great idea guys. This makes the TLR1 a better option now. I ran one for a while but kept killing batteries while the gun was in the carrying case from light AD's.
-
16 March 2011, 10:13 #8
Distinguished Member
- Join Date
- Aug 2007
- Posts
- 1,584
- Downloads
- 11
- Uploads
- 4
LOL....been there. Originally Posted by usmcvet
I contemplated the installation of a Kydex switch guard to the TLR-1 to prevent accidental light activation. After running out of mounting ideas for the guard, I figured the next best option would be modifying the switch itself.
I see the ease of switch activation and thin thumb nut as the two weak spots of the TLR-1 design, and felt both needed addressing.
http://http://www.weaponevolution.com/forum/showthread.php?1578-TLR1-Thumb-Nut-Modification-Rev.-(A)


 Reply With Quote


